WC-202 Water Cooling Kit by EverCool Author: faceless105 -- Posted: 2008-05-29
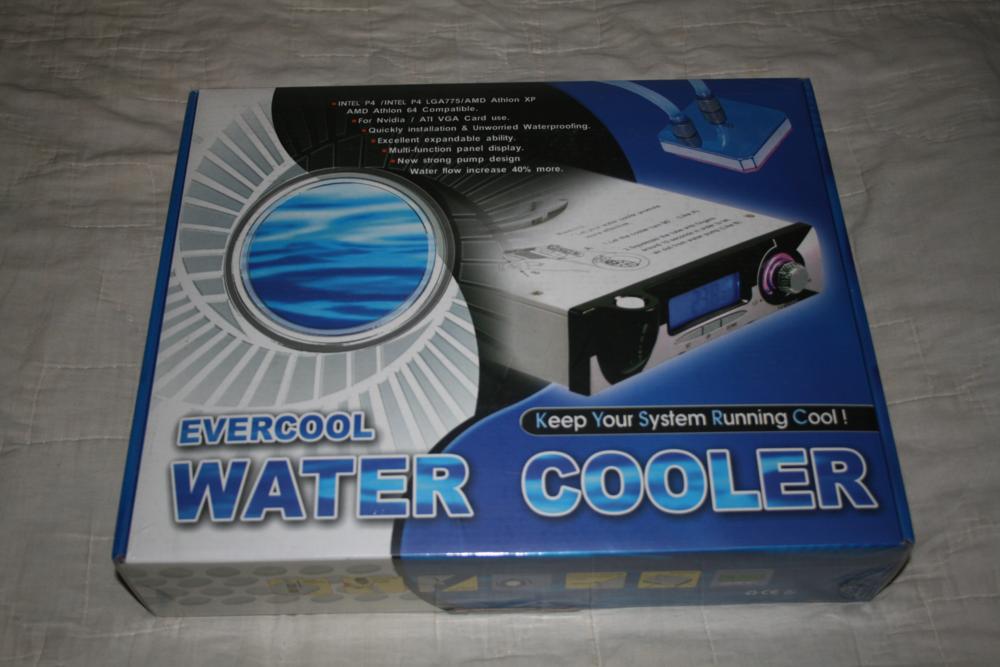
Today we'll be taking a real good look at the WC-202 Water Cooling Kit by EverCool.
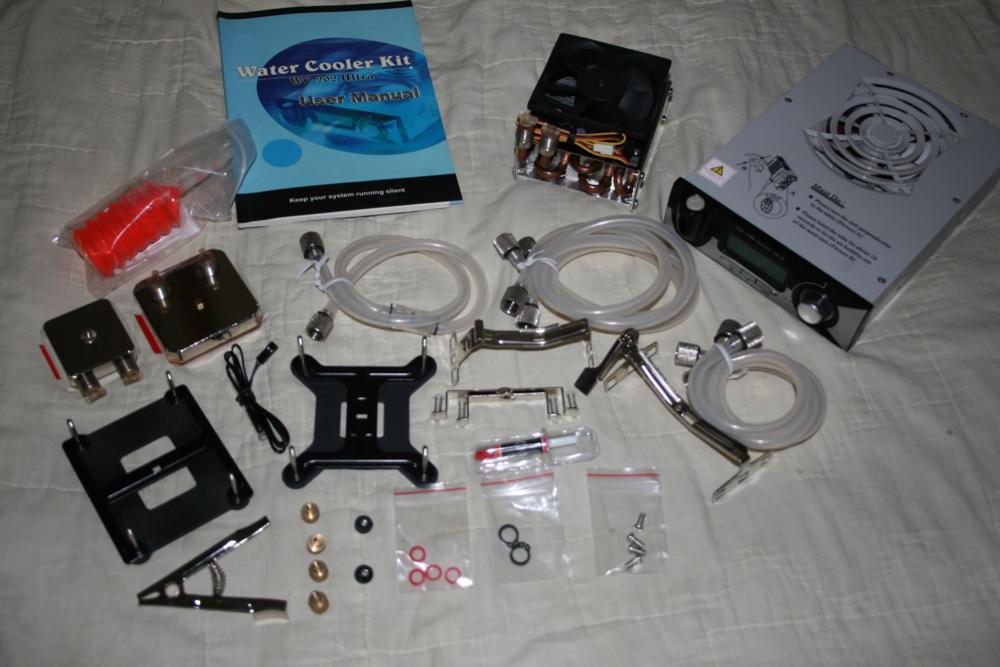
Right out of the box you can't help but think, "Wow, this is a lot of stuff to hook up". Haha. It's true, there is a lot in the box but once we get it all unpacked, we can see what all we're working with and feel a bit less overwhelmed.
The WC-202 is a great unit for just about anyone. It comes with a drive bay unit that holds the pump, reservoir, radiator, and even temperature and fan monitoring. In addition to this there is a second larger radiator with an 80mm fan. The water block is designed to fit almost all current CPU Types. In this review we'll be connecting it to an LGA775 processor. Finally after the water block for the CPU, they also give you a block for your graphics card.
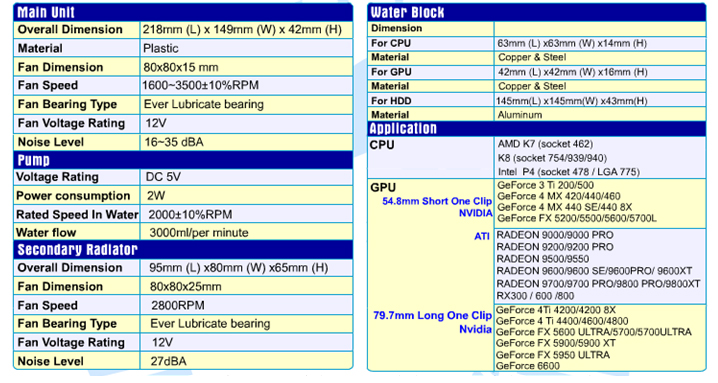
We also wanted to show you all the specs. It's a pretty long list, but this is the kind of kit that covers a ton of areas.
Now since so much of this is based on first hand experiences, we'll walk you through the use and report the stats that we found.
The System we're installing this on is an Intel Core 2 Duo E6420 Conroe 2.13GHz 4M shared L2 Cache LGA 775 65W Dual-Core Processor. Unfortunately we didn't have a graphics card that fell into the compatible list, so we instead used a HD cooler to replace the graphics block.
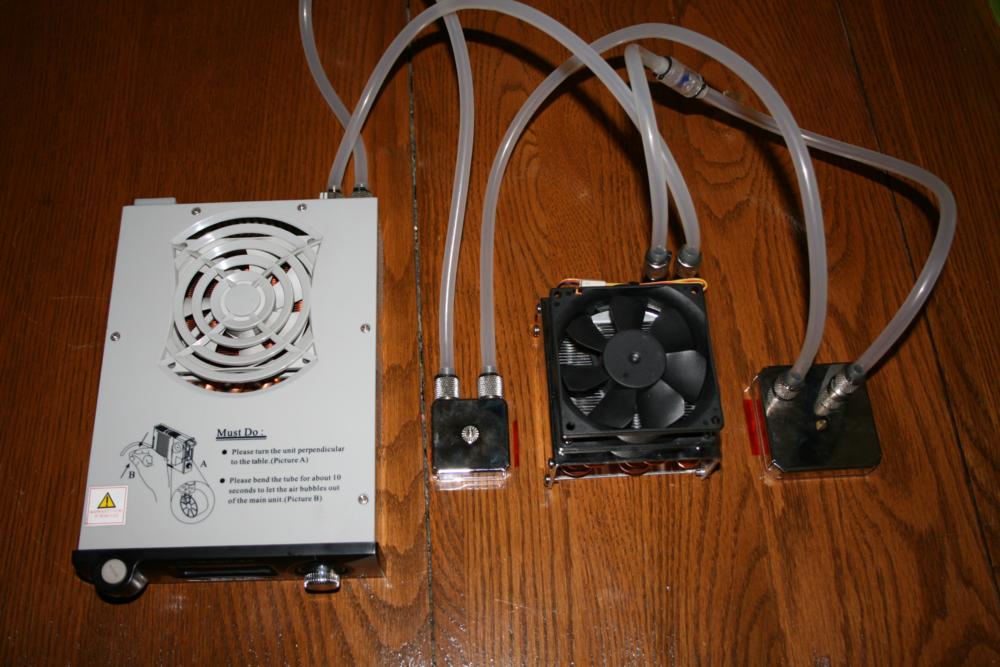
The first step we wanted to take was to set everything up and make sure that the lines were good and our connections were secure. The majority of failures with WC kits are due to user install errors and we didn't want to fall into that statistic, lol.
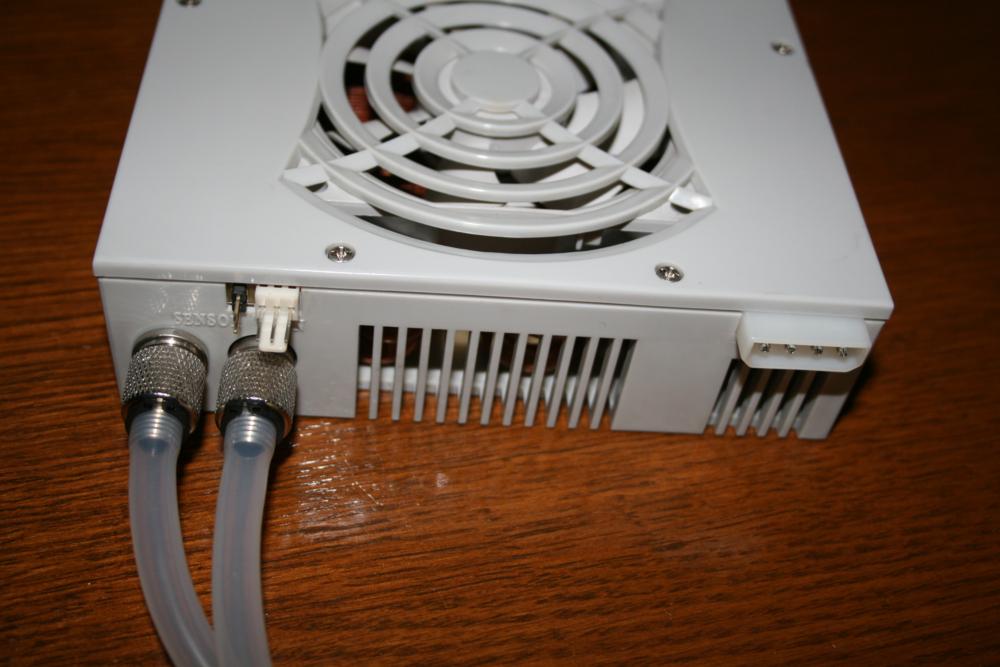
The tubing comes already connected which saves us a good amount of time. When setting it up take note of how everything would when you put it in your case. Haha you don't want to use the shortest cable you have to connect the drive bay and the second radiator. In the picture you can also see the flow valve. It isn't anything elgant but it gets the job done.
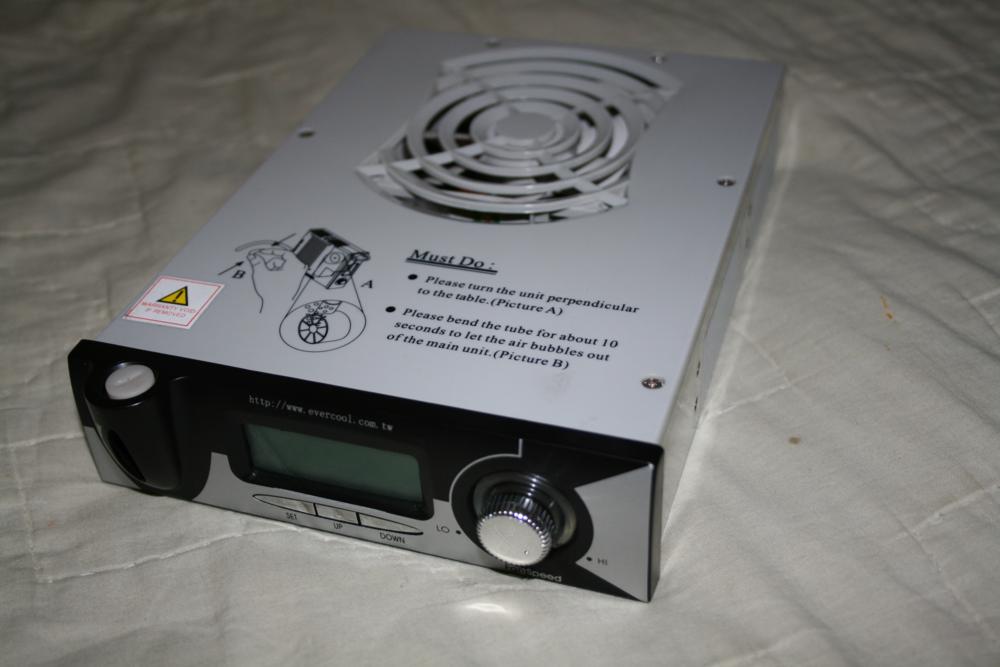
Once everything is connected you'll want to start adding the water to the kit. To do this, use the fill valve on the top of the drive bay. This is designed to make refills easy to do once you have everything put into your case. There is also a level meter just to give you a bit of indication as to how full your unit is. As you're filling it take a note of the water flow. If there are bubbles in the line, try to remove them all as those create uneven cooling and that isn't too good of a thing to have.
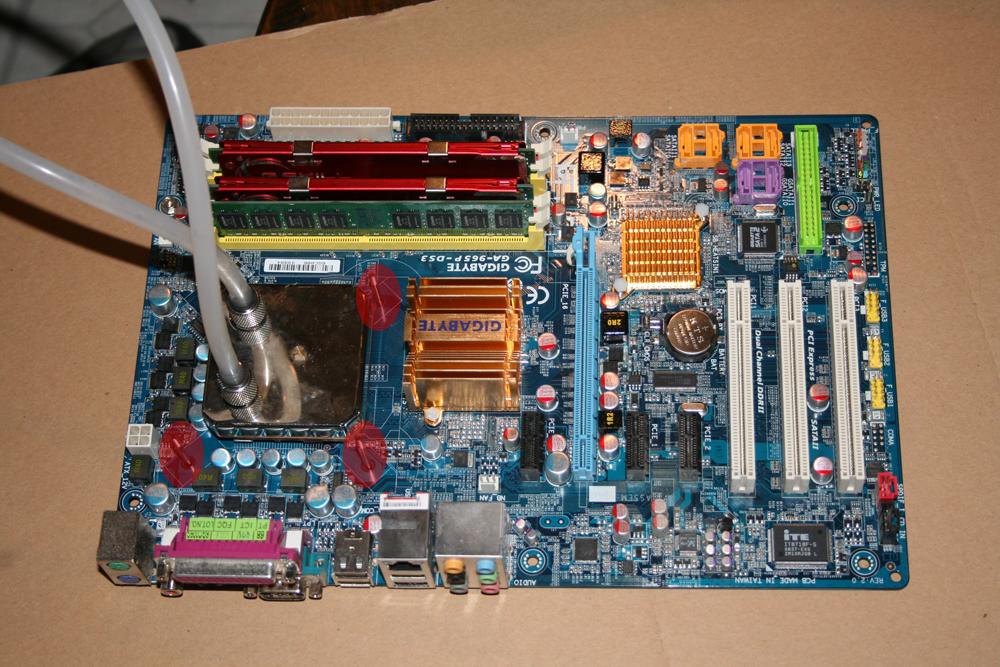
Once you cooler is filled and looks good, it's time to start putting it into the system. First thing, for the majority of the cpu types, you'll have to remove the motherboard and attach a back plate to mount the water block.
Mounting the drive bay and the second radiator is very simple. Once the water has been checked and everything is properly mounted, all that's left is turning on your system.
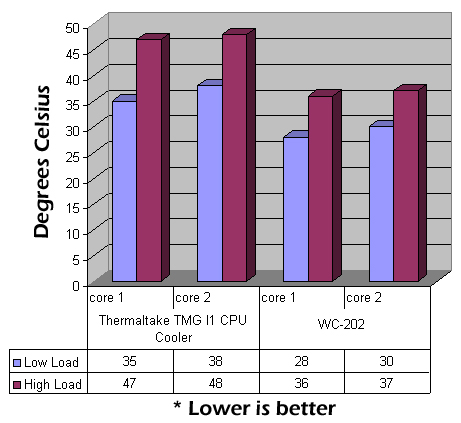
We took temperate readings before this to benchmark the system. The cooler wasn't stock so it ran fairly well before. The previous cooler was a Thermaltake TMG I1 CPU Cooler. After running benchmarks before and after, these are the results we came out with.
As you can see above, the cooler easily out performs an above average air cooler. 7-10 degrees difference is fairly significant, especially for gaming.
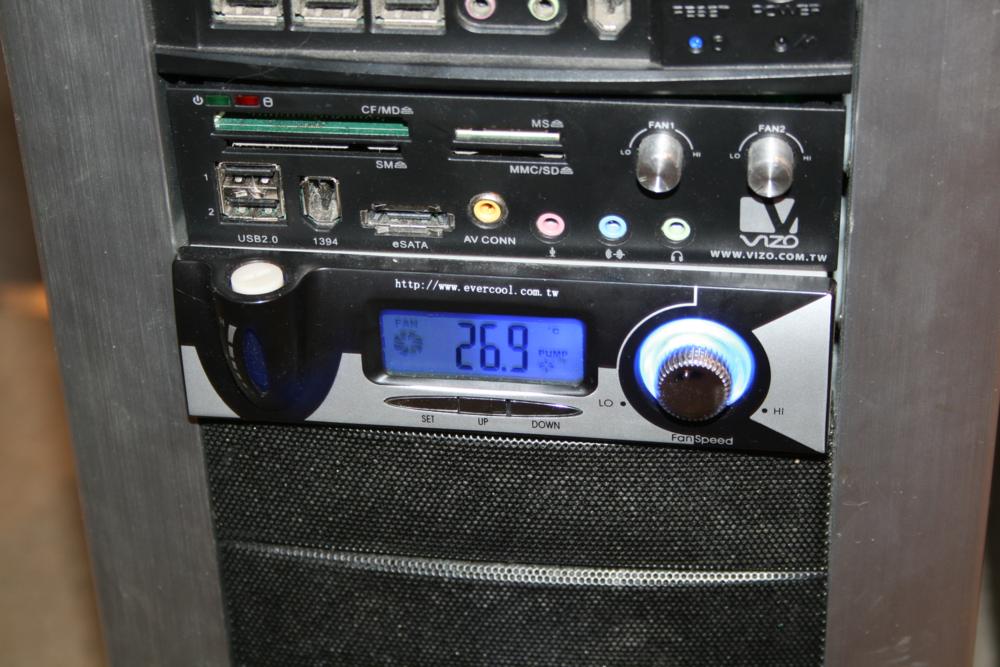
The drive bay unit comes with some decent reporting too. You can read the fan RPM, temperatures, and even see the status of the pump. You can even control the fan speed which is really nice if you leave your computer on all night. They even go all out with the fan controller and LED ring around the fan controller phases color based on the fan speed.
I'd like to thank EverCool for giving me the opportunity to review their WC-202 Water Cooling kit. This has far better performance then your typical air cooling setup and it has a number of other advantages. First is the reduction in noise. CPU coolers have notably reduced their average noise generation due mostly to the fact that they've started using larger fans, but even with that said, this kit was just barley audible with the side panel off, and once we closed it we couldn't hear anything. Another really great benefit is the extra room to work in your computer. This actually opens the dorr to a number of other cooling options that may not have existed before due to a large cpu cooler. So I definitely recommend checking this kit out. It's really easy to setup, gives you some nice controls to monitor it and if you're new to water cooling, this one won't lose you at all.
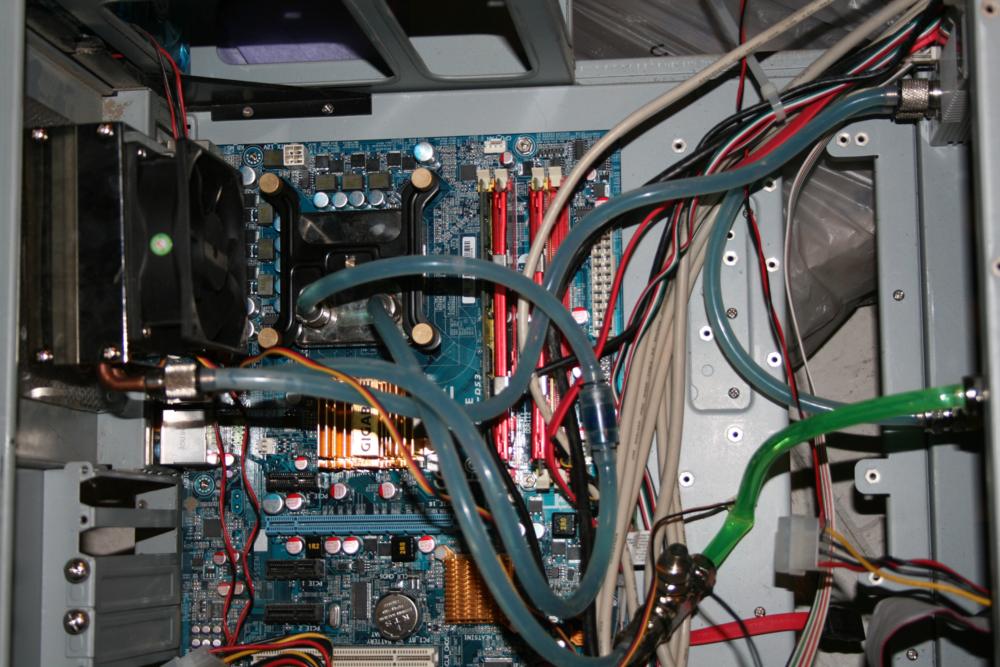
I know we covered a lot so if anyone has any questions or comments, don't hesitate to ask. We'll also leave you with some shots of this cooler in action!
* ignore that kink in the line, we fixed that seconds after taking the picture
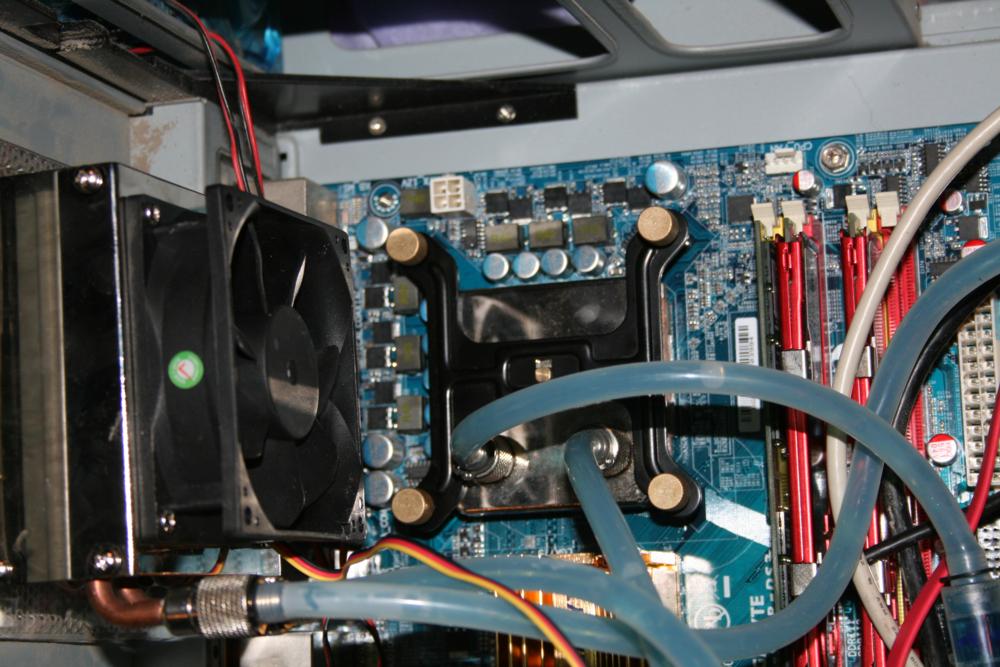
* close-up of the cpu cooler and radiator. We put blue food coloring in out lines, haha